[ad_1]
Full disclosure: this post contains Amazon affiliate links. I only mention products I personally have used and recommend…and if you purchase from Amazon using my affiliate link, I get a small commission. You won’t pay more!
In this post, I’ll show you my DIY standing desk set-up using simple items you probably have at your home. I received many requests to do this DIY stand-up desk tutorial, and I’m glad to have it up on the blog finally.
About a year ago, I invested in an adjustable standing desk . It was a great update. I press a button, and the desk goes up!
However, I’m writing this post to share what I used before buying my current adjustable standing desk. It worked for me for two years!
It seemed like most of the tutorials online on DIY standing desks require a tremendous amount of effort, tools, and time. I am not gifted in building things from scratch.
So if you’re like me and hope to build something up from things you have available, I’m sure you’ll appreciate this post.

So here’s what this post will include:
- The video tutorial on how to DIY a standing desk.
- Items you’ll need to raise your work ‘station’ quickly.
- How to stand to avoid lower back tension and leg fatigue.
- How long you should use the standing desk every day.
- Mistakes to avoid while standing.
DIY Standing Desk
I encourage you to start with simple items. You’ll get creative as you start using your standing desk and think of improvements, believe me.
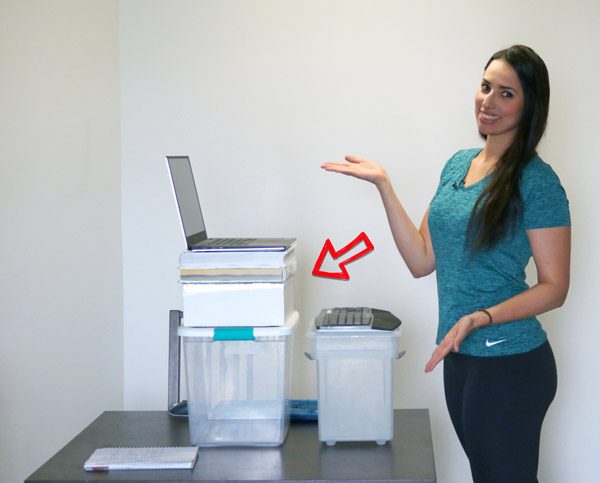
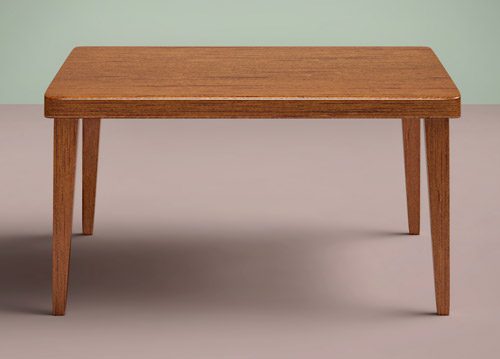
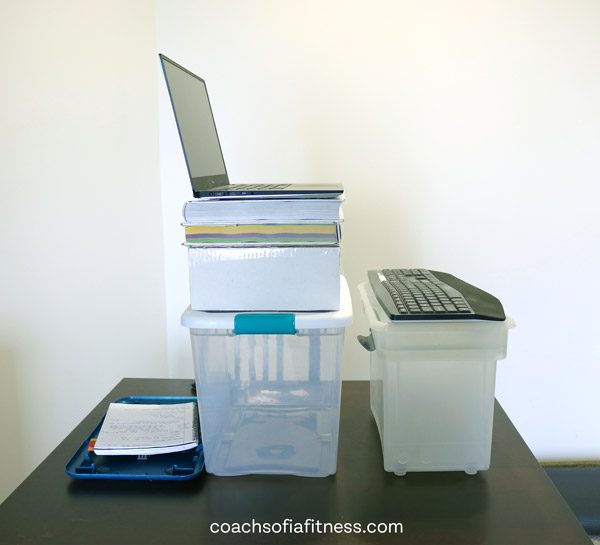
The main items you’ll need are either two rectangular tables or two storage boxes…also rectangular.
The storage boxes work perfectly fine. If you happen to have a smaller table you can use, that’ll work great too.
Make sure one of the tables or the boxes is higher up than the other.
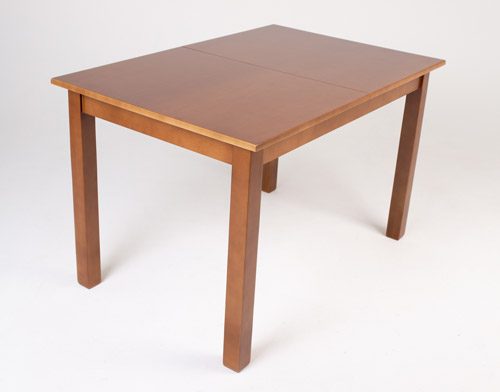
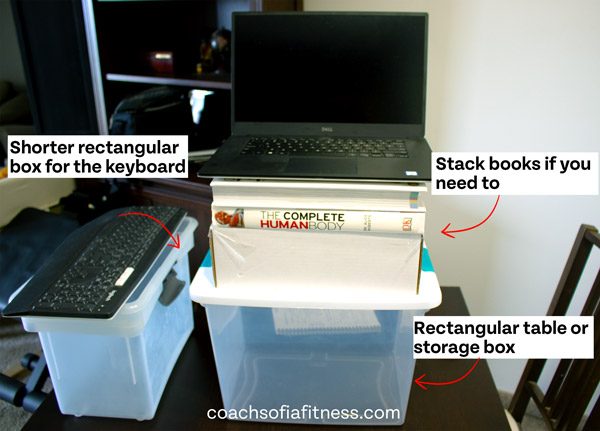
While you can use square tables, a rectangular table will provide more stability and surface area for your keyboard and computer to sit without worrying about them moving.
Initially, I only used two boxes before getting a nicer table to elevate my keyboard.

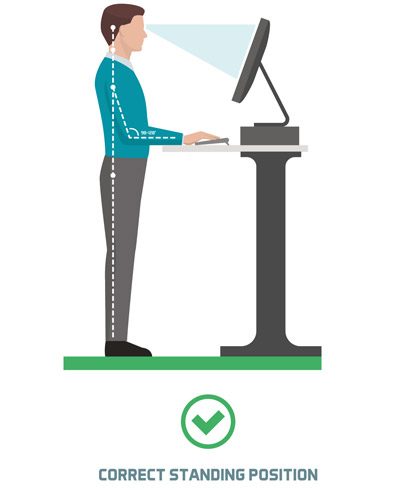
The goal is to have the laptop higher than the keyboard. When you place the laptop on the table or box, make sure the screen is as close to eye level as possible as long as you’re not looking down to see the screen.
Stack some books on top to add height.
As you can see, I got an external keyboard to avoid raising my arms to type.
Note: I found this standing desk converter that you place on your current desk and will elevate both your computer and keyboard using it. If you’re already happy with your existing desk, this may be another option. Especially if you’d like your setup to look more professional.
Proper Stand-Up Desk Posture
Many people who get muscle pain due to sitting assume that simply by switching to standing, they’ll fix the pain. And, while standing while working has positive effects on the body, it may not stop the pain entirely, and here’s why…
…Just like sitting, simply switching to a new position and locking your body in that position for hours would be considered ‘sedentary.’
In addition, people who stand for a long time to do their job often complain of lower back tension, knee pain, and foot and leg fatigue. So standing isn’t without its challenges. The goal is to alternate between sitting and standing and doing both with proper posture.
So here’s what you should keep in mind when you use your stand up desk:
Bend Your Arms at a 90-Degree Angle.
The reason I recommend you use two tables or boxes (or a combination of the two) is to make sure you’re not shrugging your shoulders up to type. This is why I recommend you get an external keyboard for typing. This shouldn’t be an issue if you have a desktop.
I’m sure it’d be okay for a few minutes. I’m assuming you’d like to use this desk for your office, and in that case, you don’t want to be elevating your shoulders up to reach for the keyboard.
Repeating this for hours and every day may result in trapezius tightness, neck and shoulder pain.
And if this is already an issue you’re having, I highly recommend you get my program, Trapezius Control. Or, start with the free trapezius pain relief sample plan here.
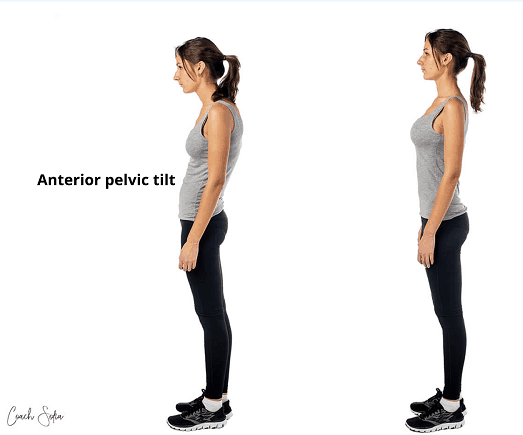
Avoid Overarching Lower Back.
One of the causes of lower back tension is holding an exaggerated anterior pelvic tilt posture when standing.
Pull your abs in to help restore a neutral pelvic position. You should be mindful of this…if you lose focus, you can quickly start to roll your hips forward and experience back tension.
A quick tip if you’re starting to feel lower back tension and can’t sit right away is to squeeze your buttons! It’ll activate your glutes and take the load off your back right away. It’s a trick I like to use whenever I need to stand for a lengthy period and can’t take a break to sit or walk.
Keep Your Core Engaged.
I don’t mean you should contact your core for hours nonstop. Keeping your core engaged can be as simple as breathing deeply and hardening your belly area for 2 seconds, releasing, repeating for 7-10 times, and doing a few sets of that every hour or so.
The core brace technique is a great way to strengthen and activate the deep core muscles that stabilize and protect your back.
Switch Between Sitting And Standing.
Again, the goal here is not to lock our bodies in a standing position all day but to switch between different postures. If you feel tired from standing, sit down and make sure to follow the techniques I shared in my best chair sitting techniques for piriformis syndrome.
The tips will help you sit without hip, piriformis, and lower back pain.
Consider Using an Anti-Fatigue Mat.
One of the things I wish I did and took me so long to learn about is anti-fatigue mats. These are padded mats that help reduce the pressure on your ankles, feet, and legs in general.
I always wear flat shoes when standing, and my feet and legs would get so tired after a full day of standing. I had a hard time sitting. And while switching to a standing desk helped my lower back pain, I’d get home and lie down from the leg exhaustion.
It felt like I was hiking for hours every day.
Avoid Balancing On One Leg
I want to share this mistake I was making without realizing it at first. I noticed that I started to balance on one leg to relax the other one. Again, this is another sign your legs are tired, and you may need to take a break and sit.
I encourage you to spend time strengthening your glutes at home to ensure your gluteus medius is doing its job and keeping your hips at the same level. This ensures your hips are not dropping if you’re standing or walking.
How long You Should Use Your Standing Desk
If this is the first time you’re switching to a stand-up desk, I’d recommend you start with a short period of time and increase that as your body gets used to this new position.
You can begin doing half an hour standing to 1-hour sitting and increase that slowly.
How long you should stand will depend on your current weight, prior injuries, and any chronic muscle conditions you currently have.
If you sustained a recent injury to your foot, for example, you want to be careful with the amount of weight and pressure you put on your feet.
If you’re perfectly healthy and just experiencing some tightness when sitting, implement the tips above and begin with short periods and increase as you go.
I wouldn’t go for more than 2-3 hours standing without any breaks because you’re likely to start making some of the mistakes above or get very tired. I used to stand all morning, get super tired by noon and struggle to get through the afternoon.
Here’s my post again with sitting tips to reduce pain and the most recent one on best chair tips to sit without pain.
I hope you found this post helpful! Consider sharing it with people who may benefit from it as well.
My full system to fix chronic lower back pain, piriformis syndrome, and hip pain. Includes premium coaching videos, tutorials on how to get back in shape safely, and how to keep the pain from coming back.
How to beat piriformis syndrome without spending years in pain. Complete home program. No gym required.

[ad_2]
Source link